Getting Started
The intent of this section is to provide a simplified introduction to some of the basic configuration tasks that most ZoneMinder servers will require. This will include setting your Timezone, enabling Authentication, adding a Monitor (camera), adding a Zone and changing the web display Theme. Detailed explanations about each particular item can be found in their respective sections of the ZoneMinder documentation.
Having followed the Installation Guide for your distribution you should now be able to load the ZoneMinder web interface which can be found at http://hostname-or-ip/zm. The image below shows an example of the ZoneMinder Console which is displayed after starting. The ZoneMinder Console is the central location from which all ZoneMinder configuration and functionality can be accessed.

ZoneMinder Console
Note
Please note that in this guide the notation of Link means that you click on the specified link on the web interface to perform the specified action.
Setting Timezone
ZoneMinder allows you to specify the Timezone in the web interface. Please set up before moving forward so that your saved events, logfiles and timestamp overlays contain correct time information. The Timezone can be changed using the following steps.
At the top of Console display click on the Options menu link.
The Options window opens. Locate and click the System tab link.
Locate the TIMEZONE parameter and use the pulldown menu to locate your Timezone.

Enabling Authentication
We strongly recommend enabling authentication during initial setup of ZoneMinder. There are some situations where certain users don’t enable authentication, such as instances where the server is in a LAN not directly exposed to the Internet. In most cases authentication should be enabled. Follow the steps below.
Click on the Options link in the top bar of the web interface.
You will now be presented with a sidebar full of Option tabs. Click on the System tab and scroll down to the section containing authentication parameters.

Authentication Parameters in System Tab
OPT_USE_AUTH: Enable by checking the box. This enables user authentication.
AUTH_HASH_SECRET: Enter a random string. This makes authentication logic more secure.
Remaining items should be left as default.
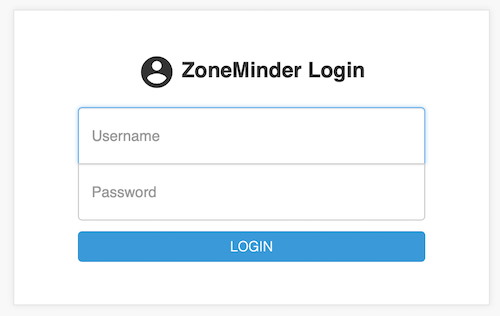
Click on Save at the top of list and that’s it! The next time you refresh that page, you will now be presented with a login screen as shown below. Job well done!
Establish Login Password
ZoneMinder defines a default user with username of admin and password of admin. Use these credentials to login to ZoneMinder for the first time. This is not very secure for a server so let’s change this before continuing setting up ZoneMinder. The password for the admin user can be changed by following the steps below.
Click on the Options link in the top bar of the web interface.
Locate and click on the Users tab link.
Select and click on user admin to open the edit window.

Changing Password in Users Tab
Enter new password in New Password and Confirm Password boxes.
Click Save to update password.
Additional users can be created with flexible levels of access. Refer to Options - Users.
Understanding the Web Console
Before we proceed, let’s spend a few minutes understanding the key functions of the web Console. At any time you can return to the Console by clicking the Console link. For the sake of illustration, we are going to use an existing ZoneMinder server already configured with several Monitors and showing recorded events.

ZoneMinder Console for Existing Configured Server
This is the Console window in ZoneMinder and shows a summary of your Monitors, associated events, Zones, server status and links to other available functionality. A brief description of many of these items is given below. Each section has a much more detailed description contained in the ZoneMinder documentation.
- [A] Options
The Options menu lets you configure many aspects of ZoneMinder. Refer to Options.
- [B] Log
This brings up a color coded log window that shows various system and component level logs. This window is useful if you are trying to diagnose issues. Refer to Logging.
- [C] Groups
ZoneMinder allows you to group Monitors for logical separation. This option lets you create new groups, associate Monitors to them and edit/delete existing groups.
- [D] Filters
Filters are a powerful mechanism to perform actions when certain conditions are met. ZoneMinder comes with some preset filters that keep a tab of disk space and others. Many users create their own filters for more advanced actions like sending emails when certain events occur and more. Refer to Filtering Events.
- [E] Cycle
The Cycle option allows you to rotate between live views of each configured Monitor.
- [F] Montage
The Montage option shows a collage of your Monitors. You can customize the placement size and location on the web interface.
- [G] Montage Review
Allows you to simultaneously view past events for different Monitors. Note that this is a very resource intensive page and its performance will vary based on your system capabilities.
- [H] Audit Events Report
This is more of a power user feature. This option looks for recording gaps in events and recording issues in mp4 files.
- [I] Current User
This shows the currently logged in user.
- [J] Run State
ZoneMinder allows you to maintain ‘Run States’. A Run State is essentially a snapshot that records the state of each Monitor and you can switch between states easily. For example, you might have a Run State defined that switches all monitors the ‘None’ Record mode while another state that sets some of the monitors to the ‘On Motion’ Record mode. Why would you want this? A great example is to disable recording when you are at home and enable when you are away, based on time of day or other triggers. You can switch states by selecting an appropriate state manually, or do it automatically via cron jobs, for example. An example of using a cron job to automatically switch is provided in the FAQ. If you click on the RUNNING link, ZoneMinder displays a popup that allows you to select or define additional Run States. ZoneMinder provides a few pre-defined Run States and you can also add your own Run States here.

- [K] System Info
This section shows information about the ZoneMinder server hardware.
- [L] Function
This shows how ZoneMinder deals with Monitor stream capture, analysis and recording. The current state of each Monitor capture, analysis and recording settings is summarized here.
- [M] Source
This is the Source column that tells you the type of the camera - if its an IP camera, a USB camera or more. In this example, they are all IP cameras. Green means the monitor is running. Red means there is something wrong with that camera.
- [N] Events
This is the core of ZoneMinder - recording events. It gives you a count of how many events were recorded over the hour, day, week, month.
- [O] Zones
This indicates number of Zones defined. Click in this link to define Zones for your monitor. Zones are areas within the camera that you mark as ‘hotspots’ for motion detection. Simply put, when you first configure your Monitors (cameras), by default ZoneMinder uses the entire field of view of the camera to detect motion. You may not want this. You may want to create Zones specifically for detecting motion and ignore others. For example, lets consider a room with a fan that spins. You surely don’t want to consider the fan moving continuously a reason for triggering a record? Probably not - in that case, you’d leave the fan out while making your zones. Refer to Defining Zones.
- [P] Console Filter
This is a visual filter which lets you filter the console display based on text you enter. While this may not be particularly useful for small systems, ZoneMinder is also used in larger installations with well over 200+ cameras and this visual filter helps reduce the monitors you are viewing at one time.
Adding Monitors
Now that we have a basic understanding of the Console web interface, lets go about adding a new Monitor. In ZoneMinder the source of a video stream is called a Monitor and this can come from many types of sources, most commonly from an IP camera.
Prior to adding Monitors in ZoneMinder you will need the following information at minimum: URL to access the video stream, authentication user/password, IP address, video resolution in pixels, frames per second (FPS) and the video stream protocol.
The generic camera we are using as an example here has the following characteristics: URL of rtsp://username:password@ipaddress:port/videoMain, resolution of 1280x960 pixels, 5 frames per second (FPS), RTSP protocol using TCP and an h.264 encoded stream. The specific information for your cameras will be different, of course.
Determining camera characteristics is one of the challenging aspects of ZoneMinder configuration. There are several ways to find camera information. The primary way would be the camera user manual or manufacturer product support website. The ZoneMinder community also has a frequently updated list here that lists information about many cameras. If you don’t find your camera there and can’t seem to find it elsewhere, feel free to register and ask in the user forums.
Click on the +ADD button in Console window as shown below:

This brings up an empty Monitor entry window starting on the General tab:

Configuring Monitor - General Tab
Name: Anything can be entered here but a description of location or area is generally useful. This camera is located in a garage so let’s call this ‘Garage’.
Source Type: FFmpeg is the recommended source type for most modern IP cameras and also the default value in ZoneMinder. For this example, FFmpeg is the appropriate choice. There are many choices for Source Type in ZoneMinder. For a detailed description of them please see Defining Monitors.
We are done with the General tab. Move to the next tab by clicking on Source.

Configuring Monitor - Source Tab
Source Path: Enter the URL for the camera stream you identified earlier. Note that if your URL contains camera authentication these may be automatically populated into the Username and Password fields.
Capture Resolution: Enter the resolution of the camera stream you are using. This example uses 1280x960 pixel resolution. The pulldown menu for this contains many commonly used camera resolutions or you can enter the horizontal and vertical resolution manually.
Other options can be left as the default settings.
We are done with the Source tab. Move to the next tab by clicking on Recording tab link.

Configuring Monitor - Recording Tab
Recording: For this example we want to only record events when motion is detected. Select On Motion / Trigger / etc from the dropdown menu.
Storage Area: Select Default.
This completes a very simplified Monitor setup. Click on Save. As one can see there are a substantial number of configuration options available. Some additional configuration parameters beyond this simple Getting Started may be needed for your specific camera and hardware setup. Many of these options are discussed in detail later in the Documentation.
You now have a configured monitor as seen below in the Console. To see if everything works, click on the Garage monitor you just added and you should be able to see the live feed. If you don’t, inspect your ZoneMinder logs to debug.

Console with Configured Monitor
Adding Zones
After adding a Monitor the next step is to define Zones which will be used for image analysis. By default each added Monitor has one zone defined which covers the full area captured by the camera. In most cases this is not very useful, especially if you intend to capture specific events such as a door opening or an object entering a specific area. Let’s define a new Zone appropriate for this Monitor. This new Zone will help to reduce the number of events captured and space required on your storage system.
Referring to the Console image above, click on the 1 on the right side of the Garage Monitor row. This brings up the Zones window for the Garage Monitor shown below.

Configuring Zones - Zone List
Click on +ADD NEW ZONE to define a new Zone for this Monitor.

Configuring Zones - Defining Zone Analysis and Zone Area
Name: Enter a descriptive name for this specific Zone. In this example we want to limit the analysis to the driveway so let’s use that as its name. Having well defined Zone names can be helpful when filtering events or reviewing logfiles.
Preset: For new users of ZoneMinder it is best to start with the available Presets and make changes from there. Zone definition and proper setting of the available parameters to optimize each unique camera stream takes some time to learn. From the Preset pulldown menu, select Best, High Sensitivity for this Zone example.
Points: You can either drag the corner vertex points as required or enter the X and Y coordinates directly in the table. Additional points can be added by clicking the + on any existing point.
Click Save to complete the definition for the Driveway Zone.

Configuring Zones - Deleting the Default All Zone
Delete the initial default ‘All’ Zone by selecting the Mark checkbox in the ‘All’ Zone row. Click Delete to remove the Zone.
Congratulations! You have now defined a Monitor and appropriate Zone for a typical use case.

A Fully Configured Zone
Selecting Themes
When you first install ZoneMinder, the web interface uses what is called the Base theme. It is worthwhile to note that ZoneMinder has Base, Classic and Dark themes available. These themes are controlled by the Skin and CSS settings found in the Options menu.
Click on the Options link on the top of the web interface Console.
This will bring you to the Options window as shown below. Click on the System tab to access the available CSS themes. Changes applied here will remain after you end the session. Note that the theme for the current session will not change, see the next steps to change the theme immediately for the current session.

Click Save at the bottom if you decide to change the default theme.
Now, switch to the Display tab. Changes applied here will only remain until you end the current session. This allows you to try out the different CSS themes available.

Click Save at the bottom if you decide to change the session theme.

Example of Base Theme Console

Example of Dark Theme Console

Example of Classic Theme Console
Conclusion
This was a quick Getting Started guide where you were introduced to the very basics of how to set your Timezone, setup Authentication, add a Monitor (camera), define a Zone and change the ZoneMinder display Theme. We’ve skipped many details to keep this concise. Please refer to Options for details about setting the various Options, Defining Monitors for details about setting up Monitors and finally Defining Zones for details about setting up Zones.